Dataset Padding
You can add padding to images, regions of interest, and multi-ROIs. Right-click the required object in the Data Properties and Settings panel.
Choose Modify and Transform > Padding in the pop-up menu to open the Dataset Padding panel, shown below.
Dataset Padding panel
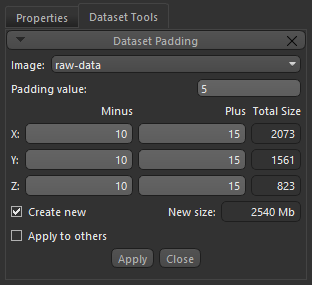
You can choose a value for the padded area voxels, as well as to add padding to the minus and/or plus side of each axis.
How to Add Padding to a Dataset
- Right-click the required dataset in the top section of the Data Properties and Settings panel and then choose Modify and Transform > Padding in the pop-up menu.
The Dataset Padding panel appears on the Dataset Tools tab.
- Select the item to which you want to add padding in the drop -down menu, if required.
- Choose a value in the Padding value edit box.
- Enter the required padding for the X, Y
- Check the Create new option, if required. If checked, a new dataset will be created with the selected changes.
- Check the Apply to others option, if required. If checked, the Select Objects dialog will appear when you click the Apply button.
You can choose the additional datasets to crop in the Select Objects dialog, shown below.

- Click the Apply button.
